Diamond painting, a captivating art form that merges creativity with relaxation, has gained immense popularity in recent years. As you meticulously place tiny resin diamonds onto a canvas, a stunning image gradually emerges, captivating both the creator and the viewer. Once you've completed your diamond painting, the next step is to preserve and showcase it appropriately. Framing your diamond painting not only protects it but also enhances its beauty, turning it into a timeless piece of art to be cherished for years to come.
Understanding Diamond Painting
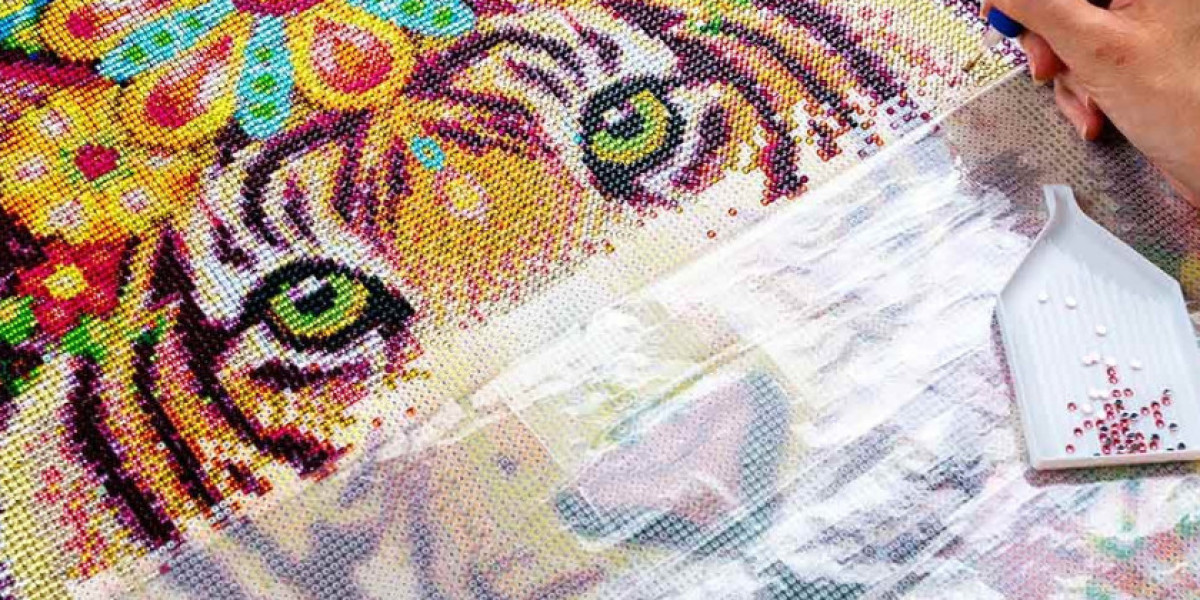
Before delving into the framing process, it's essential to understand the nature of diamond paintings. These artworks consist of a canvas printed with a design and adhesive layer, onto which tiny resin diamonds or drills are applied. The final result is a sparkling mosaic that captures intricate details and vivid colors.
Materials Needed
To frame your diamond painting, gather the following materials:
1. Completed Diamond Painting: Ensure your painting is fully dried and the diamonds are securely attached.
2. Frame: Choose a frame that complements the size and style of your painting.
3. Backing Board or Foam Board: Provides support and stability for your painting.
4. Double-Sided Tape or Glue: Secures the painting to the backing board.
5. Scissors or Craft Knife: For trimming excess canvas or backing board.
6. Mounting Hardware: If your frame doesn't include hanging hardware, you'll need to purchase appropriate hooks or wire.
7. Protective Glass or Acrylic Sheet: Optional, but recommended for added protection.
Step-by-Step Framing Process
1. Prepare Your Workspace
Choose a clean, flat surface to work on. Lay out all your materials within easy reach.
2. Measure and Trim
Measure your completed diamond painting and cut the backing board to fit its dimensions. Trim any excess canvas from around the edges if necessary.
3. Attach the Painting to the Backing Board
Carefully apply double-sided tape or glue to the back of the canvas, ensuring even coverage. Press the canvas firmly onto the backing board, smoothing out any wrinkles or air bubbles.
4. Insert into Frame
Place the framed backing board into your chosen frame, ensuring a snug fit. If necessary, use additional backing board or spacers to prevent the painting from shifting within the frame.
5. Secure the Frame
If your frame has tabs or clips, use them to secure the backing board in place. Alternatively, you can use framing points or nails to hold everything together.
6. Add Protective Glass (Optional)
For added protection against dust, moisture, and UV rays, consider fitting your frame with a sheet of glass or acrylic. Ensure it's clean and free of scratches before inserting it into the frame.
7. Attach Hanging Hardware
If your frame doesn't already have hanging hardware attached, now's the time to add it. Install hooks, wire, or sawtooth hangers according to your preferred method of display.
8. Inspect and Display
Carefully inspect your framed diamond painting for any flaws or imperfections. Once satisfied, choose a prominent location to display your masterpiece and enjoy the admiration it garners.
Tips for Success
Choose a Suitable Frame: Select a frame that complements the style and color palette of your diamond painting.
Handle with Care: Avoid touching the surface of your diamond painting with bare hands to prevent oil transfer or damage to the diamonds.
Consider Professional Framing: If you're unsure about framing your diamond painting yourself, consider seeking professional framing services for optimal results.
Keep It Clean: Regularly dust your framed painting with a soft, dry cloth to maintain its pristine appearance.
Conclusion
Framing your completed diamond painting not only protects it from damage but also elevates it to the status of a cherished piece of art. By following these step-by-step instructions and tips, you can showcase your creativity and craftsmanship for all to admire. Whether displayed in your home or given as a thoughtful gift, a framed diamond painting is sure to captivate and inspire.